Drew Recipe

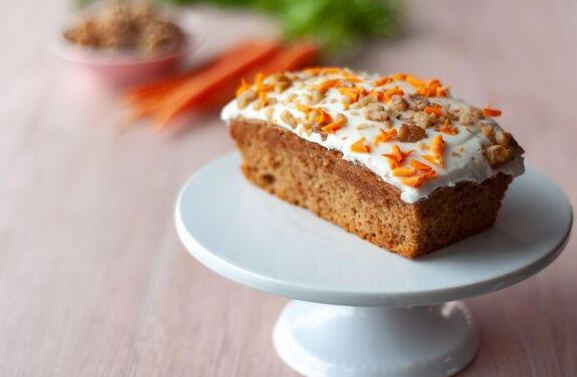
Carrot Cake

Created on 8/16/2024
Ingredients:

Bread Ingredients

  • 2 ½ cups (315 g) all-purpose flour
  • 1 cup (200 g) granulated sugar
  • 1 cup (200 g) light or dark brown sugar¹ firmly packed
  • 1 ½ teaspoon baking soda
  • 1 teaspoon baking powder
  • 1 teaspoon salt
  • 2 teaspoons ground cinnamon
  • ½ teaspoon ground nutmeg
  • 1 cup (235 ml) cooking oil use canola, avocado, or vegetable oil
  • ½ cup (113 g) unsalted butter melted
  • 4 large eggs room temperature
  • 1 Tablespoon vanilla extract
  • 3 cups (340 g) grated carrots² peel before grating
  • 1 cup (125 g) chopped walnuts or pecans optional

Cream Cheese

  • ½ cup (1 stick) (113 g) unsalted butter softened
  • 8 oz (226 g) cream cheese softened (brick-style, not spreadable)
  • 1 teaspoon vanilla extract
  • ¼ teaspoon salt
  • 4 cups (500 g) powdered sugar

Baking Instructions:

Step One: Preheat oven to 350F and prepare a 9×13″ pan by lining the bottoms with parchment paper and lightly greasing and flouring the sides

Step Two: In a large bowl, whisk together your flour, sugars, baking powder, baking soda, salt, cinnamon, and nutmeg

Step Three: Add your canola oil and melted butter and stir well (batter will be pretty stiff and thick at this point, I usually use an electric mixer or my stand mixer to combine everything nicely)

Step Four: Add eggs, one at a time, stirring well after each addition. Then stir in vanilla extract. Then Stir in carrots and nuts (if using) until ingredients are well-combined

Step Five: Evenly divide carrot cake batter into prepared baking pans and bake on 350F for approximately 45-50 minutes

Step Six: Allow cakes to cool in the pans for 10 minutes, then run a knife around the edge and invert onto cooling rack to cool completely

Cream Cheese Instructions:

Step One: Combine butter and cream cheese in a large bowl and use an electric mixer to beat until creamy, well-combined, and lump-free

Step Two: Add vanilla extract and sprinkle salt into the bowl and stir well to combine

Step Three: With mixer on low, gradually add powdered sugar until ingredients are completely combined (be sure to scrape the sides and bottom of the bowl with a spatula)

Step Four: Once your cake has cooled completely, cover with frosting
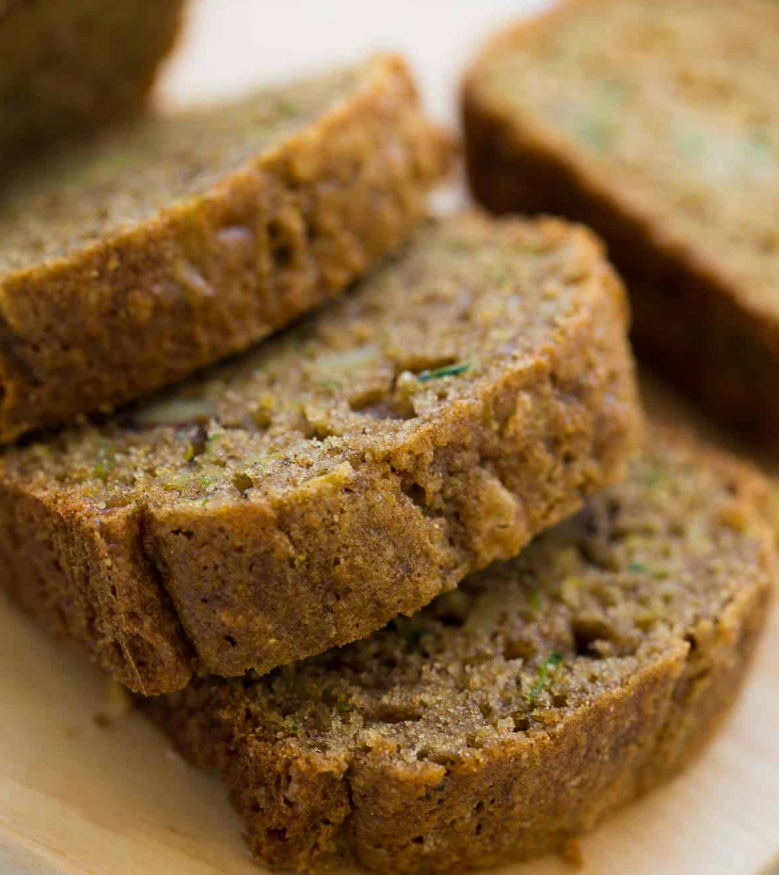
Gluten-Free Zucchini Bread

Created on 8/9/2024

Ingredients:

OTHER:

  • 1/4 cup brown sugar
  • 1/2 cup white sugar
  • 2 eggs
  • 1/3 cup vegetable oil or oil of choice
  • 1/4 cup almond milk room temperature
  • 1 teaspoon lemon juice
  • 2 teaspoons vanilla
  • 1 cup finely grated zucchini squeezed of excess water (from about 1 large zucchini)
  • 1/2 cup chopped walnuts or chocolate chips

Instructions:

Step One: Preheat the oven to 350F. Grease 3 mini loaf pans (or one 9×5 loaf pan) with cooking spray or coconut oil

Step Two: In a medium bowl, combine the dry ingredients. Whisk to evenly distribute

Step Three: Add the brown sugar, white sugar, eggs, oil, almond milk, lemon juice, and vanilla. Using a hand mixer, mix on low to evenly combine. Add the zucchini and mix for 30 seconds or so on low to combine. Add the walnuts or chocolate chips and stir to combine

Step Four: Pour the batter into the prepared loaf pans. Bake for 30-35 minutes, until set in the middle. Let sit in the pan for 10 minutes to cool, then turn out onto a wire rack to continue cooling. Store leftovers wrapped tightly in plastic wrap at room temperature

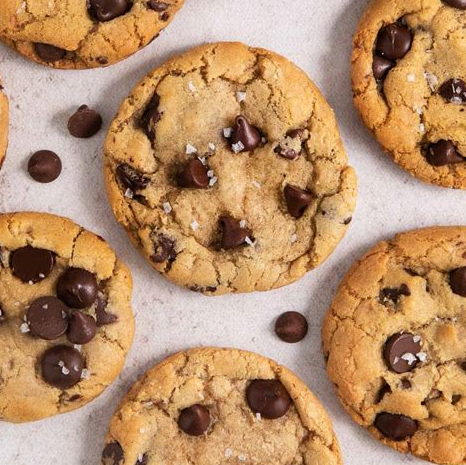
Gluten-Free Chocolate Chip Cookies

Created on 5/24/2024

Ingredients:

  • 1 1/3 cups (225g) gluten-free measure-for-measure flour
  • 1/4 cup (25g) almond flour
  • 1 teaspoon baking soda
  • 1/2 teaspoon kosher salt
  • 1/2 cup (113g) butter
  • 1 tablespoon milk of choice
  • 3/4 cup (160g) brown sugar
  • 1/4 cup (50g) granulated sugar
  • 1 large egg
  • 2 teaspoons vanilla extract
  • 1 cup (170g) chocolate chips
  • sea salt for sprinkling optional

Instructions:
Step One: In a medium bowl, whisk together the gluten-free flour, almond flour, baking soda and salt. Set aside

Step Two: Melt the butter in a medium skillet over medium-low heat, stirring occasionally

Step Three: Once the butter is melted and begins to foam, stir continuously to prevent the milk solids from sticking to the skillet. The butter will change from yellow to golden brown quickly and will have a nutty aroma. Remove from the heat and immediately pour into a medium bowl

Step Four: Add the milk, brown sugar and granulated sugar to the brown butter. Whisk to combine.

Step Five: Whisk in the egg and vanilla until smooth and creamy

Step Six: Using a rubber spatula, mix in the dry ingredients until well-combined. Stir in the chocolate chips

Step Seven: Cover the bowl and let the dough sit at room temperature for 30 minutes, or refrigerate for up to 5 days

Step Eight: Preheat the oven to 350°F. Line large baking sheets with parchment paper or silicone baking mats

Step Nine: Scoop the cookie dough into round balls, about 2 tablespoons per ball. Place on the prepared baking sheet, about 2 inches apart

Step Ten: Bake for 10-12 minutes or until the edges are golden brown and the center is set

Step Eleven: Remove from the oven and cool on the baking sheet for 5 minutes. Sprinkle with flaky salt, if desired. Transfer to a wire rack to cool completely

Notes:

Gluten-Free Flour: Be sure to use a gluten-free flour blend that contains xanthan gum. I use King Arthur Flour Measure-for-Measure Flour. Other 1:1 gluten-free flours that contain xanthan gum such as Bob’s Red Mill 1:1 Baking Flour will also work. Dairy-Free: Skip steps 2-3 and simply use melted dairy-free butter (note that dairy-free butter will not brown). Omit the milk. Use dairy-free chocolate chips. 

Story: I made these when Drew’s parents came to town to help us work on our one-car garage, plant 11 trees, and hang two ceiling fans. The least I could do to thank them was make these GF cookies.

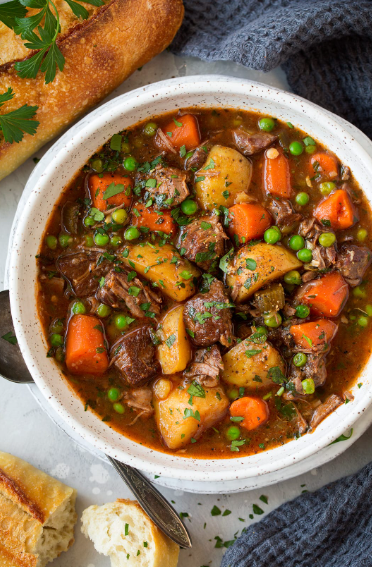
Beef Stew

Created on 12/28/2023

Ingredients:

  • 3 pounds boneless beef chuck (well-marbled), cut into 1½-inch pieces
  • 2 teaspoons salt
  • 1 teaspoon freshly ground black pepper
  • 3 tablespoons olive oil
  • 2 medium yellow onions, cut into 1-inch chunks
  • 7 cloves garlic, peeled and smashed
  • 2 tablespoons balsamic vinegar
  • 1½ tablespoons tomato paste
  • ¼ cup all-purpose flour
  • 2 cups dry red wine
  • 2 cups beef broth
  • 2 cups water
  • 1 bay leaf
  • ½ teaspoon dried thyme
  • 1½ teaspoons sugar
  • 4 large carrots, peeled and cut into 1-inch chunks on a diagonal
  • 1 pound small white boiling potatoes (baby yukons), cut in half
  • Fresh chopped parsley, for serving (optional)

Instructions:

Step One: Preheat the oven to 325°F and set a rack in the lower middle position

Step Two: Pat the beef dry and season with the salt and pepper. In a large Dutch oven or heavy soup pot, heat 1 tablespoon of the olive oil over medium-high heat until hot and shimmering. Brown the meat in 3 batches, turning with tongs, for about 5 minutes per batch; add one tablespoon more oil for each batch. (To sear the meat properly, do not crowd the pan and let the meat develop a nice brown crust before turning with tongs.) Transfer the meat to a large plate and set aside

Step Three: Add the onions, garlic and balsamic vinegar; cook, stirring with a wooden spoon and scraping the brown bits from bottom of the pan, for about 5 minutes. Add the tomato paste and cook for a minute more. Add the beef with its juices back to the pan and sprinkle with the flour. Stir with wooden spoon until the flour is dissolved, 1 to 2 minutes. Add the wine, beef broth, water, bay leaf, thyme, and sugar. Stir with a wooden spoon to loosen any brown bits from the bottom of the pan and bring to a boil. Cover the pot with a lid, transfer to the preheated oven, and braise for 2 hours

Step Four: Remove the pot from the oven and add the carrots and potatoes. Cover and place back in oven for about an hour more, or until the vegetables are cooked, the broth is thickened, and the meat is tender. Fish out the bay leaf and discard, then taste and adjust seasoning, if necessary. Serve the stew warm — or let it come to room temperature and then store in the refrigerator overnight or until ready to serve. This stew improves in flavor if made at least 1 day ahead. Reheat, covered, over medium heat. Garnish with fresh parsley, if desired

Notes: The stew can be frozen for up to 3 months. Before serving, defrost the stew in the refrigerator for 24 hours and then reheat on the stovetop over medium-low heat until hot

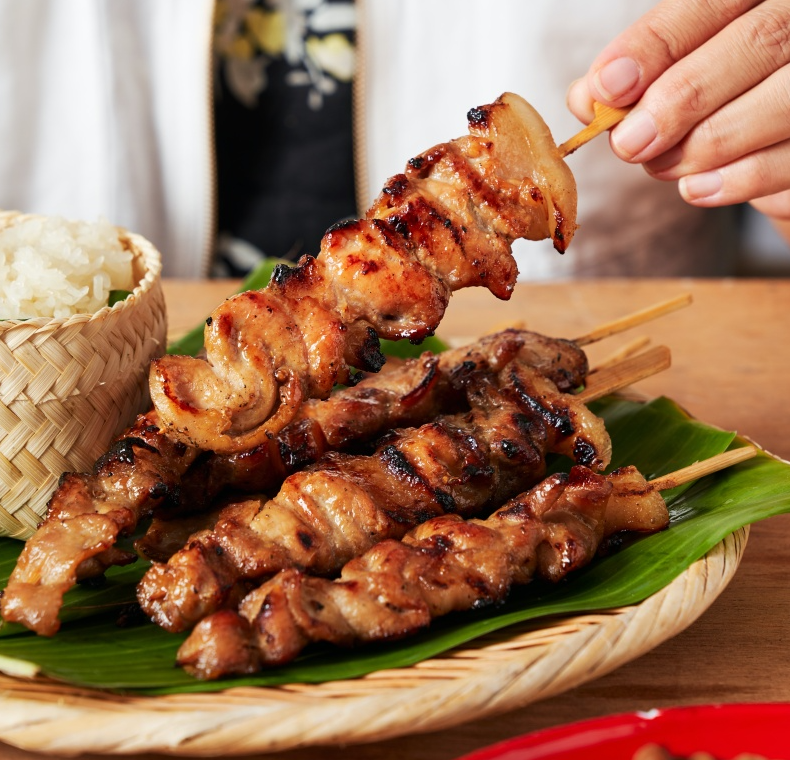
Thai-style Grilled BBQ Pork

Ingredients:

  • Frozen sticky rice
  • 16 ounces pork loin
  • 5 ounces pork back fat
  • Bamboo skewers
  • 4 garlic cloves, peeled
  • 3 cilantro roots
  • 1/2 tsp coriander seeds
  • 1/2 tsp palm sugar (or regular white sugar)
  • 2 tbsp fish sauce
  • 3 tbsp black soy sauce
  • 2 tsp vegetable oil
  • 1/2 tsp salt
  • 2 tsp cornstarch
  • 1/4 coconut milk, extra for basting

Instructions:
Step One:
For the pork skewers, start by cutting the pork loin into very thin, around 2mm-thick (1/16 inch) slices – you almost want to be able to see through it. Transfer the slices to a large bowl. Next, take your strip of back fat and cut it into slightly thicker slices than you did with the pork loin. Transfer to a small bowl

Step Two:
To make the marinade, add the garlic cloves, coriander roots, coriander seeds and peppercorns to a mortar. Use a pestle to pound the ingredients into a rough paste. Transfer to the pork loin, followed by the palm sugar, fish sauce, Thai black soy sauce or kecap manis, vegetable oil, salt, cornflour and coconut milk. Using clean hands, mix everything together until the palm sugar has dissolved into the marinade and the meat is evenly coated. Set aside for 1 hour to allow all the flavours to make friends with one another

Step Three:
In the meantime, soak your bamboo skewers in water to prevent them from burning on the grill later. Once your pork has marinated, add a piece of pork fat to the skewer, then concertina a couple of slices of pork on. Repeat with another piece of pork fat and two more pork slices. Continue on in this way with the remaining skewers, pork slices and pork fat

Step Four: To cook the skewers, you could use a charcoal grill like I did, or a frying pan, grill plate or a barbecue. Cook the skewers for around 2-3 minutes on one side until you’ve got some nice colour, then flip and baste with some coconut milk. Cook for another 2–3 minutes or until the pork is cooked through and everything is looking nice and golden brown. Serve with the sticky rice

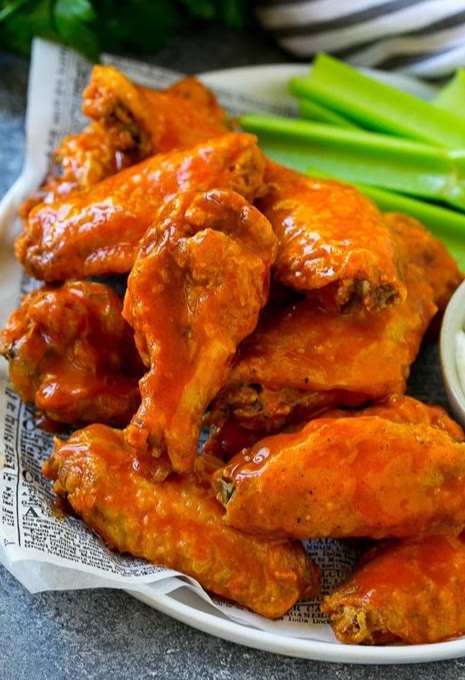
Buffalo Chicken Wings

Created on 12/22/2023

Ingredients:

  • 1 lb chicken wings
  • 2 teaspoons baking powder
  • 1 teaspoon kosher salt
  • 1/4 cup Hot Sauce (such as Frank’s Red Hot Sauce)
  • 2 tablespoons Butter (melted)
  • 1/2 tablespoon Honey
  • ½ teaspoon Pepper
  • ½ teaspoon Garlic Powder
  • ½ teaspoon Onion Powder
  • Add Celery/Carrot Sticks And Ranch Dressing (for serving)

Instructions:

Step One: Preheat the oven to 400˚F (200˚C). Line a baking sheet with parchment paper or foil and set a wire rack on top.

Step Two: Add the chicken wings to a large bowl and dry with a paper towel, then toss with the baking powder and salt until evenly coated.

Step Three: Arrange the wings on a wire rack, then bake for 1 hour, flipping every 20 minutes, or until golden brown and crispy.

Step Four: Make the buffalo sauce: In a large skillet over medium, combine the salt, hot sauce, butter, honey, black pepper, garlic powder, and onion powder. Add the wings and toss to coat.

Notes: Serve with tater tots or french fries! Allow these to cook in the oven for about 40 minutes.

Story: Drew and I have been on a chicken wing kick for a while now. Getting wings for takeout is so expensive! But buying chicken wings at the store and cooking them up yourself is easy and worth it.

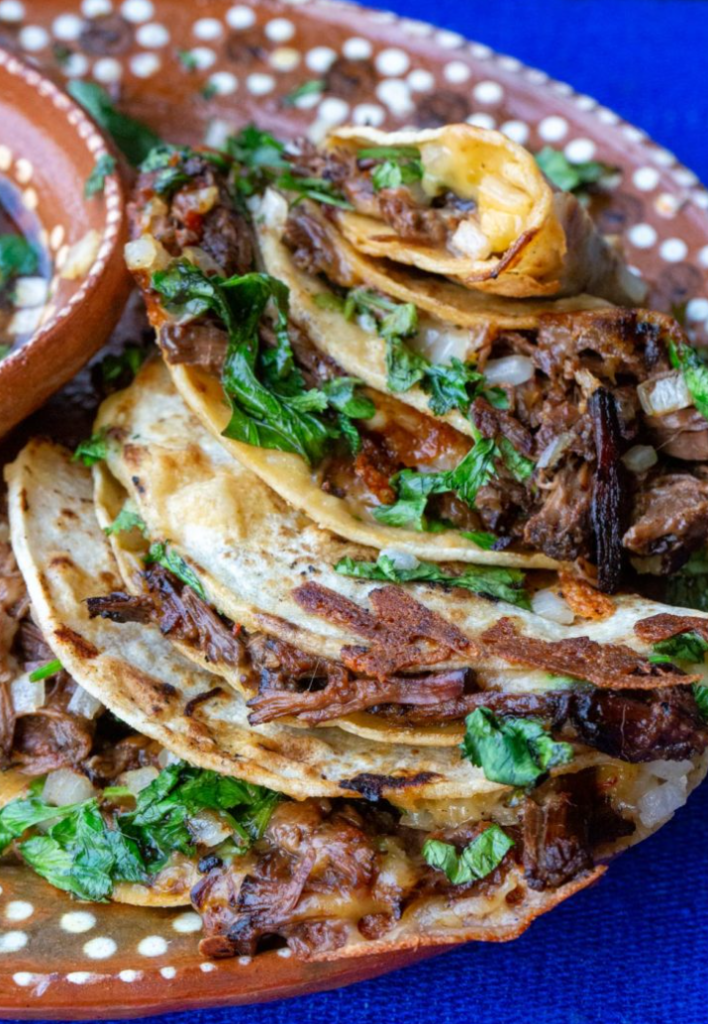
Birria Tacos

Created on 8/8/2023

Ingredients:

  • 3 pounds beef (chuck roast, beef shank, short ribs, oxtail), lamb, or goat meat
  • 2 tablespoons vegetable oil
  • 3 dried ancho chilis (very mild, smoky, 1000 – 2000 SHU)
  • 3 dried guajillo chilis (sweet, smoky, not very spicy, 2500–5000 SHU)
  • 1 new Mexican dried chiles (mild, sweet 800 – 1400 SHU)
  • Optional: 1 dried chile de árbol (quite spicy, 15000 – 30000 SHU)
  • 1 onion, sliced
  • 6 garlic cloves, chopped
  • 2 bay leaves
  • ½ cinnamon stick or ½ teaspoon cinnamon powder
  • 2 teaspoons dried Mexican oregano or oregano
  • 1½ teaspoon cumin seeds, ground
  • 1 teaspoon coriander, ground
  • 2 teaspoons tomato paste
  • 2 cups unsalted chicken stock or high-quality unsalted beef stock
  • 2 tablespoons apple cider vinegar
  • Optional: 1 tablespoon regular soy sauce
  • Optional: 1 tablespoon fish sauce
  • Salt & ground black pepper

Garnish:

  • 8 – 12 corn tortillas
  • Good melting cheese (i.e. Oaxaca cheese or mozzarella cheese), freshly grated
  • White onion, diced
  • Cilantro, finely chopped
  • Lime slices

Instructions:

Step One: Prepare Dried Chiles – Remove stems and seeds from dried chiles, then cut chiles into smaller pieces. Toast Dried Chiles in Instant Pot – Put all dried chiles in Instant Pot. Press “Saute” button to “Sauté More” to heat up the Instant Pot. Stir occasionally. Once you smell the chiles’ aroma (~4 to 5 mins), remove and set aside the toasted chiles

Step Two: Brown Meat in Instant Pot – Wait until the Instant Pot says “HOT”. Pat dry your meat. Season one side of beef with salt & black pepper. Add 1 tbsp vegetable oil in inner pot, and ensure to coat the oil all over the whole bottom of the pot. Carefully place the seasoned side of beef in Instant Pot. Season the other side of beef with more salt & black pepper. Brown one side for 5 minutes before flipping the meat, then brown the other side for another 5 minutes. Set aside the browned meat

Step Three: Saute Onions and Garlic – Add another 1 tbsp vegetable oil to Instant Pot. Add in sliced onions, then saute for 3 minutes. Add in garlic cloves, 2 bay leaves, ½ cinnamon stick, 2 tsp dried Mexican oregano, 1½ tsp ground cumin seeds, 1 tsp ground coriander, and 2 tsp tomato paste, then saute for another minute

Step Four: Deglaze Instant Pot – Pour in 1 cup unsalted chicken stock, then deglaze by scrubbing all the flavorful brown bits off the bottom with a wooden spoon. Give it a quick mix

Step Five: Pressure Cook Birria – Add in 2 tbsp apple cider vinegar, 1 tbsp (15ml) regular soy sauce, 1 tbsp fish sauce, and another cup of unsalted chicken stock, then give it a quick mix. Add in toasted dried chiles (make sure all chiles are submerged in the cooking liquid). Layer browned beef on top. With Venting Knob in Venting Position, close the lid, then turn Venting Knob to Sealing Position. Cook the Beef Shank & Chuck Roast Pieces on High Pressure for 1 hour then Natural Release for 15 minutes

Step Six: Blend and Shred Beef – Transfer beef to a large mixing bowl. Find and discard the bay leaves & cinnamon stick. Keep all the chiles in Instant Pot. Blend the birria sauce with an immersion hand blender. With two forks, shred the beef, then transfer the shredded beef back to the Instant Pot

Step Seven: Season Birria: Taste and adjust the seasoning by adding more salt (for reference: we added roughly 4 – 6 large pinches of salt)

Heat up a skillet over medium heat. Dip corn tortillas in the birria sauce. Make sure the birria sauce is fully covering both sides of corn tortillas because the tortillas will break if they’re too dry. If you’re using a cast-iron skillet, grease pan with oil to prevent tortillas from sticking. You can use a bit of oil for a non-stick pan. It’s important your skillet is hot enough before you start to pan-fry the tortillas. Place corn tortilla on the heated skillet. Layer a handful of grated melting cheese on corn tortilla, then let the cheese melt. Once the cheese has melted and the corn tortilla is a bit crisped, layer some birria meat on the cheese. Fold corn tortilla in half. Serve these birria tacos immediately with dipping sauce and lime slices

Notes: Make extras for the freezer!

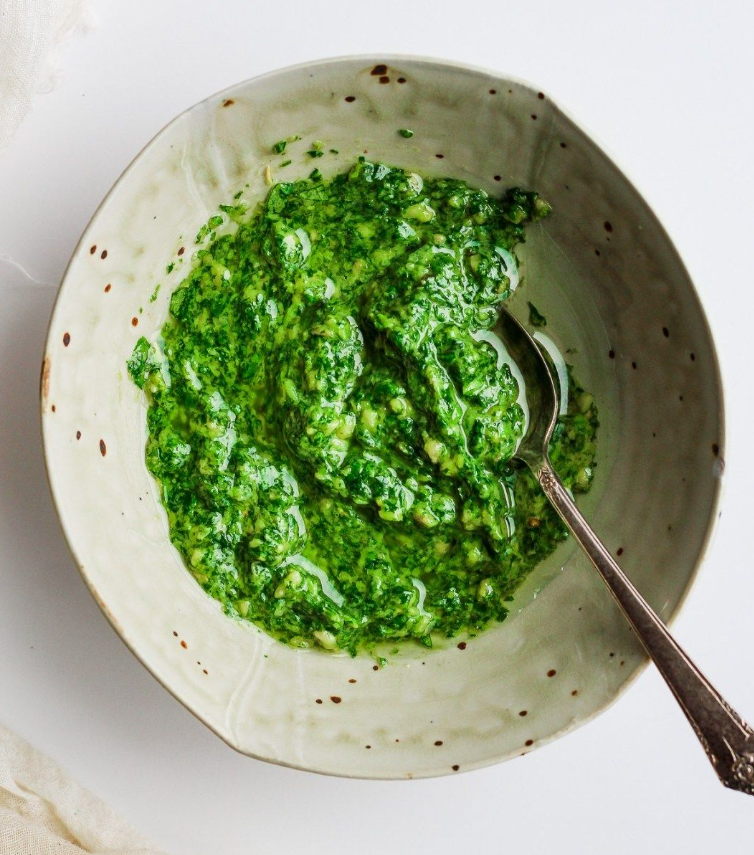
Vegan Pesto

Created on 7/20/2023

Ingredients:

  • 2 cups Fresh Basil (packed, large stems removed)
  • 3 tablespoons Walnuts (or pine nuts, if nut-free, try sunflower seeds!)
  • 3 large cloves Garlic (peeled)
  • 2 tablespoons Lemon Juice
  • 4 tablespoons Nutritional Yeast
  • ¼ teaspoon Sea Salt (plus more to taste)
  • 3 tablespoons Extra Virgin Olive Oil
  • 6 tablespoons Water (plus more as needed)

Instructions

Step One: To a food processor or small blender, add the basil, nuts, garlic, lemon juice, nutritional yeast, and sea salt and blend/mix on high until a loose paste forms

Step Two: Add olive oil a little at a time (streaming in while the machine is on if possible) and scrape down sides as needed. Then add 1 Tbsp (15 ml) water at a time until the desired consistency is reached – a thick but pourable sauce. (If avoiding oil altogether, sub the oil with vegetable broth or just use all water)

Step Three: Taste and adjust flavor as needed, adding more nutritional yeast for cheesy flavor, salt for overall flavor, nuts for nuttiness, garlic for bite / zing, or lemon juice for acidity

Notes: This sauce will be good in the fridge for up to a week.

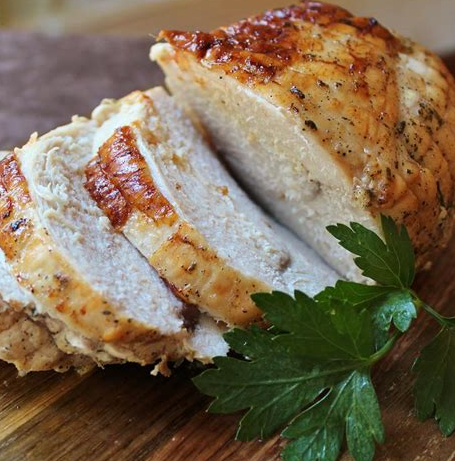
Herb Roasted Turkey Breast

Created on 7/20/2023

Ingredients:

  • 1 bone-in turkey breast (5 to 6 pounds)
  • 5 teaspoons lemon juice
  • 1 tablespoon olive oil
  • 1 to 2 teaspoons pepper
  • 1 teaspoon dried rosemary, crushed
  • 1 teaspoon dried thyme
  • 1 teaspoon garlic salt
  • 1 medium onion, cut into wedges
  • 1 celery rib, cut into 2-inch pieces
  • 1/2 cup white wine or chicken broth

Instructions:

Step One: Preheat oven to 325°. With fingers, carefully loosen the skin from both sides of turkey breast. Combine lemon juice and oil; brush under the skin. Combine the pepper, rosemary, thyme and garlic salt; rub over turkey

Step Two: Place onion and celery in a 3-qt. baking dish. Top with turkey breast, skin side up. Pour wine into the dish

Step Three: Bake, uncovered, until a thermometer reads 170°, 2 to 2-1/2 hours. (Cover loosely with foil if turkey browns too quickly.) Cover and let stand 15 minutes before carving

Spicy Coconut Grilled Chicken Thighs

Created on 6/14/2023

Ingredients:

  • 3″ piece fresh ginger
  • 5 garlic cloves
  • ¾ cup coconut milk
  • ¼ cup hot chili paste (such as sambal oelek)
  • ¼ cup fresh lime juice
  • 2 Tbsp. light brown sugar
  • 1 Tbsp. Diamond Crystal or 1¾ tsp. Morton kosher salt
  • 2 Tbsp. vegetable oil, plus more for grill
  • 2 lb. skinless, boneless chicken thighs
  • ½ cup cilantro leaves with tender stems
  • Lime wedges (for serving)

Instructions:

Step One: Prepare a grill for medium heat. Finely grate ginger and garlic into a medium bowl. Add coconut milk, chili paste, lime juice, brown sugar, salt, and 2 Tbsp. oil and whisk to combine. Add chicken and toss to coat. Let sit at least 15 minutes or up to 4 hours

Step Two: Remove chicken from marinade, letting excess drip back into bowl, and transfer to a rimmed baking sheet. Pour marinade into a small saucepan. Bring to a boil, then reduce heat to medium-low and simmer, stirring occasionally, until slightly reduced and thick enough to coat the back of a spoon, 2–3 minutes

Step Three: Clean and generously oil grate of grill (if there are a few flare-ups while you do so, not to worry, they will burn off). Grill chicken, turning once and basting occasionally with marinade, until you see some good grill marks and chicken is cooked through, 8–10 minutes

Step Four: Transfer chicken to a platter. Brush with remaining marinade. Top with cilantro and serve with lime wedges alongside