Step One: Preheat oven to 325°. With fingers, carefully loosen the skin from both sides of turkey breast. Combine lemon juice and oil; brush under the skin. Combine the pepper, rosemary, thyme and garlic salt; rub over turkey
Step Two: Place onion and celery in a 3-qt. baking dish. Top with turkey breast, skin side up. Pour wine into the dish
Step Three: Bake, uncovered, until a thermometer reads 170°, 2 to 2-1/2 hours. (Cover loosely with foil if turkey browns too quickly.) Cover and let stand 15 minutes before carving
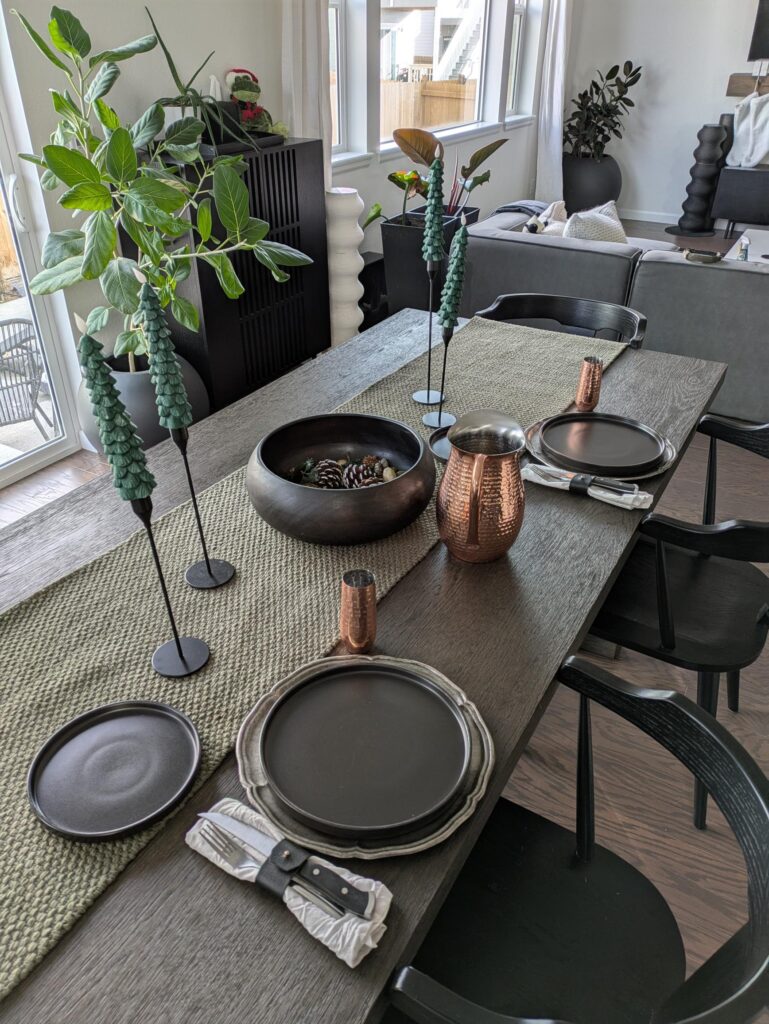
Story: I made this for the first Thanksgiving dinner in our new house!
1 Tbsp. Diamond Crystal or 1¾ tsp. Morton kosher salt
2 Tbsp. vegetable oil, plus more for grill
2 lb. skinless, boneless chicken thighs
½ cup cilantro leaves with tender stems
Lime wedges (for serving)
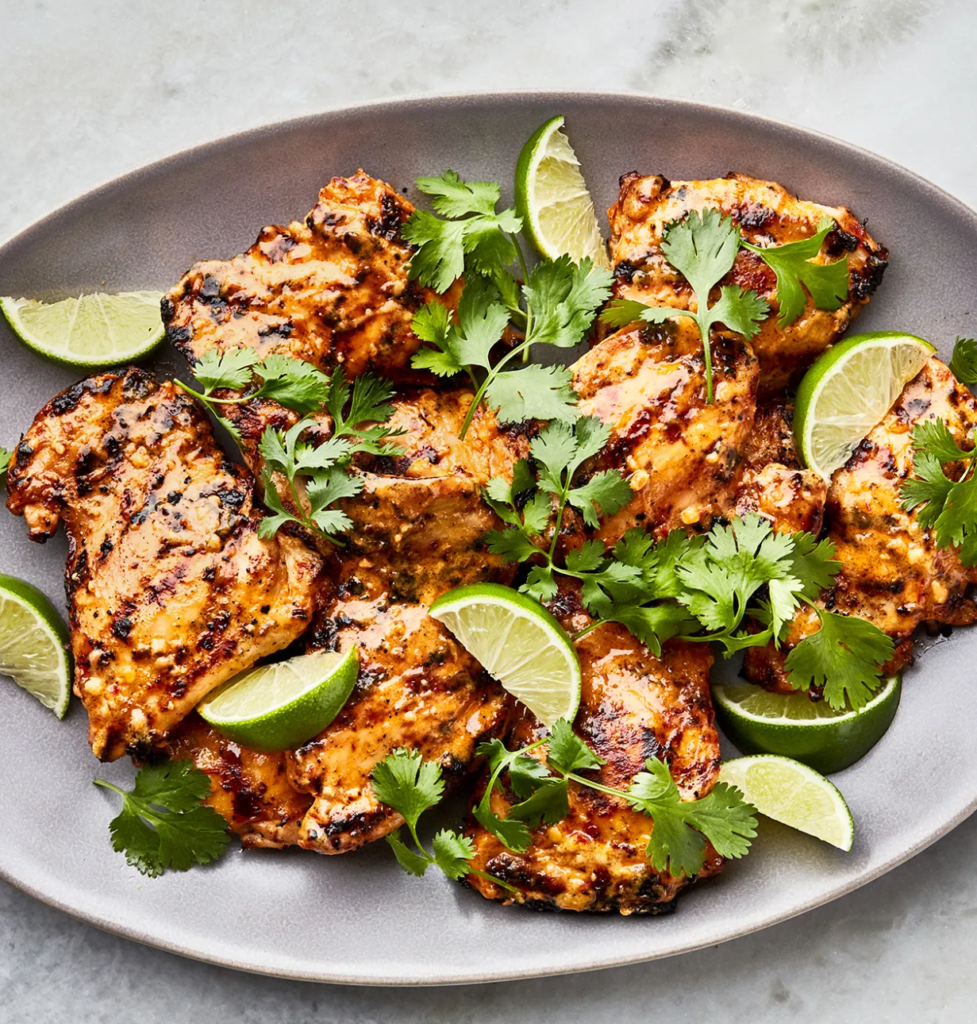
Instructions:
Step One: Prepare a grill for medium heat. Finely grate ginger and garlic into a medium bowl. Add coconut milk, chili paste, lime juice, brown sugar, salt, and 2 Tbsp. oil and whisk to combine. Add chicken and toss to coat. Let sit at least 15 minutes or up to 4 hours
Step Two: Remove chicken from marinade, letting excess drip back into bowl, and transfer to a rimmed baking sheet. Pour marinade into a small saucepan. Bring to a boil, then reduce heat to medium-low and simmer, stirring occasionally, until slightly reduced and thick enough to coat the back of a spoon, 2–3 minutes
Step Three: Clean and generously oil grate of grill (if there are a few flare-ups while you do so, not to worry, they will burn off). Grill chicken, turning once and basting occasionally with marinade, until you see some good grill marks and chicken is cooked through, 8–10 minutes
Step Four: Transfer chicken to a platter. Brush with remaining marinade. Top with cilantro and serve with lime wedges alongside
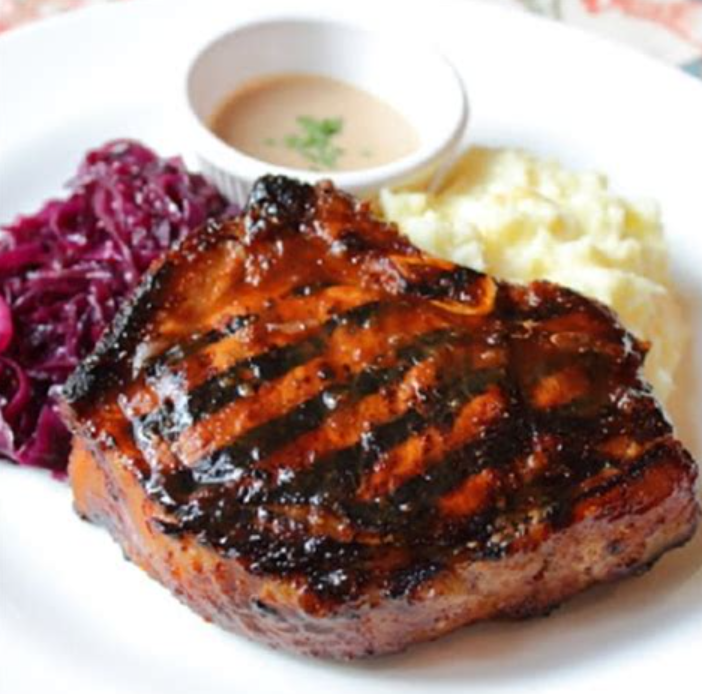
Step One: Make marinade: Combine hoisin sauce, garlic, soy sauce, ginger, red wine vinegar, rice vinegar, sherry vinegar, sesame oil, sugar, hot sauce, white pepper, and black pepper in a large bowl. Whisk thoroughly until combined
Step Two: Place pork chops in a resealable plastic freezer bag; pour slightly more than 1/2 of the marinade into the freezer bag over pork chops. Seal the bag and refrigerate for 6 to 8 hours. Reserve remaining marinade
Step Three: Preheat an outdoor grill for high heat. Lightly oil the grate
Step Four: Remove pork chops from marinade; pat dry with paper towels. Discard used marinade
Step Five: Cook pork chops on the preheated grill until brown grill marks appear, about 4 minutes per side
Step Six: Move pork chops to indirect medium heat and continue cooking, brushing reserved marinade on each side, until no longer pink inside, about 25 minutes. An instant-read thermometer inserted into the centers should read at least 145 degrees F (63 degrees C)
Step One: Add sake and mirin to a small sauce pan and cook for about 5 minutes, until the alcohol has evaporated
Step Two: Turn the heat down to medium to medium low and add in the miso paste. Stir this until the miso is fully incorporated
Step Three: Add in the sugar. Mix the sugar until it is full incorporated. Let the mixture cool. Pour the mixture over the fridge and let it marinate for 24 hours – 3 days (the longer the better)
Step Four: Turn on the broiler in the oven to high. Place the fish on a baking sheet and cook under the broiler for about 5 minutes each side. You want to see the sides of the fish start to turn brown and carmelize
Notes: Serve with soba noodles and bok choy to replicate this Nobu dish.
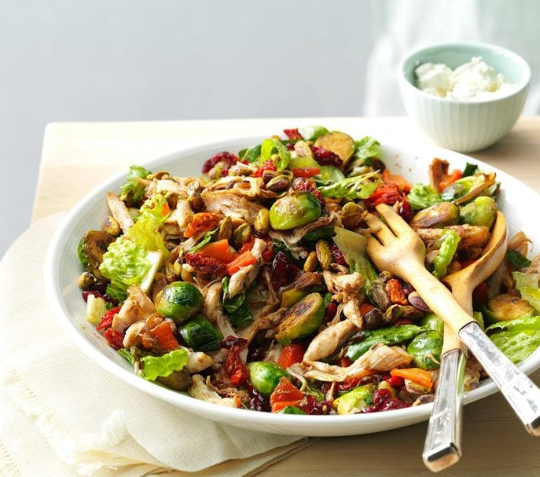
1 lb grilled chicken breast, sliced into 1-inch pieces
1 lb brussel sprouts, halved vertically
1/2 cup pomegranates
1/2 green apple, sliced into tiny pieces
Goat cheese
Salt and pepper
Vinegarette
3/4 cup extra virgin olive oil
1/4 cup apple cider vinegar
1/8 teaspoon dijon mustard
1/2 teaspoon salt
Instructions
Step One: Grill the chicken with spices of choice. Olive oil, balsamic vinegar, salt/pepper and rosemary is a great marinade for this chicken
Step Two: Roast brussel sprouts tossed with salt and pepper in oven until a little charred and tender
Step Three: Create the vinegarette by combining all ingredients in a mason jar or bowl, stir or shake until well combined
Step Four: Add the brussel sprouts to the vinegarette, add the apple and pomegranate. Top the salad with chicken and goat cheese and serve
Note: This recipe is even better with crispy bacon added to the salad
Story: During the apocalyptic period of COVID, Mandi and I went to a local restaurant called Austin’s and ordered this amazing salad on repeat. The green apple with goat cheese and brussels makes this salad both healthy and satisfying!
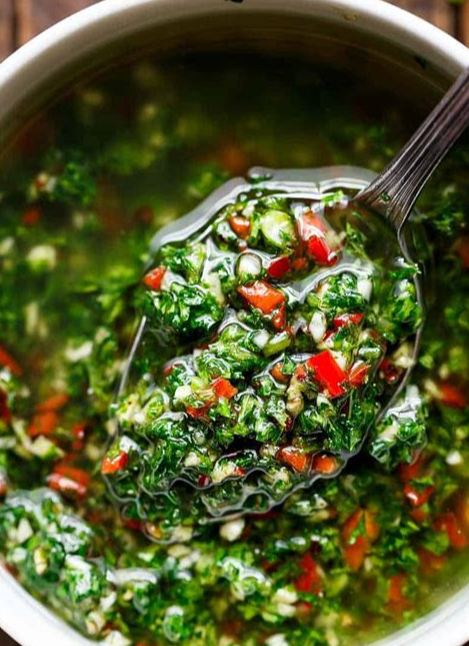
2 small red chilies , or 1 red chili, deseeded and finely chopped (about 1 tablespoon finely chopped chili)
3/4 teaspoon dried oregano
1 level teaspoon coarse salt
pepper , to taste (about 1/2 teaspoon)
Instructions:
Step One: Mix all ingredients together in a bowl. Allow to sit for 5-10 minutes to release all of the flavors into the oil before using. Ideally, let it sit for more than 2 hours, if time allows
Step Two: Chimichurri can be prepared earlier than needed, and refrigerated for 24 hours, if needed
Step Three: Use to baste meats (chicken or steaks) while grilling or barbecuing. This can also be used as a marinade, although that is not authentic to South America
Notes: This is excellent on seafood like scallops, shrimp and white fish
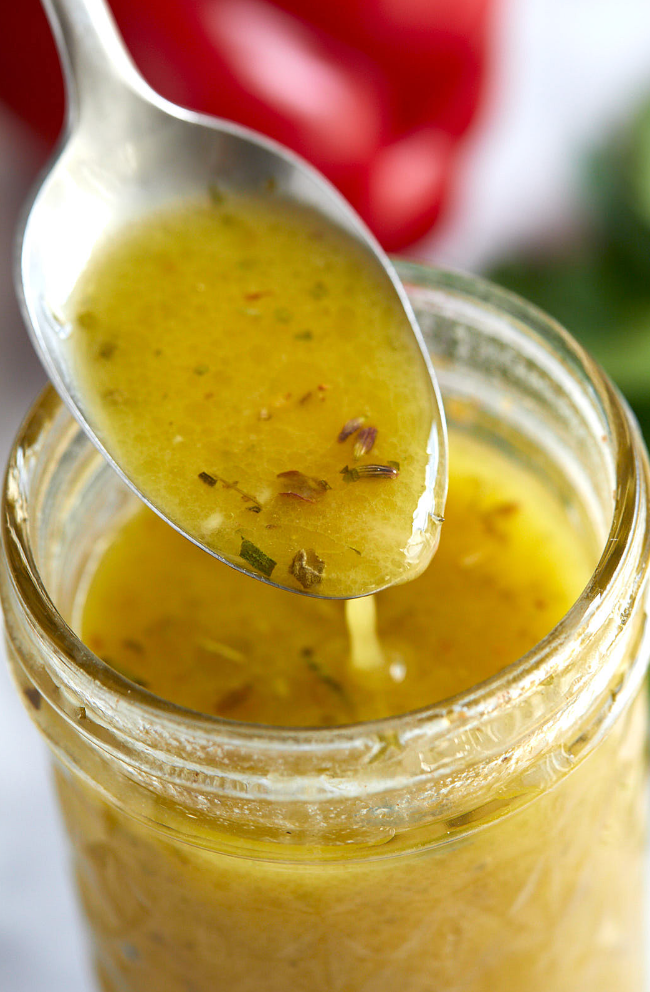
Step One: Add all ingredients to a mason jar or salad dressing jar and shake vigorously to emulsify the ingredients. If you prefer a thinner dressing, add a tablespoon of water at a time, shake vigorously, then assess the consistency. Add more water if desired.
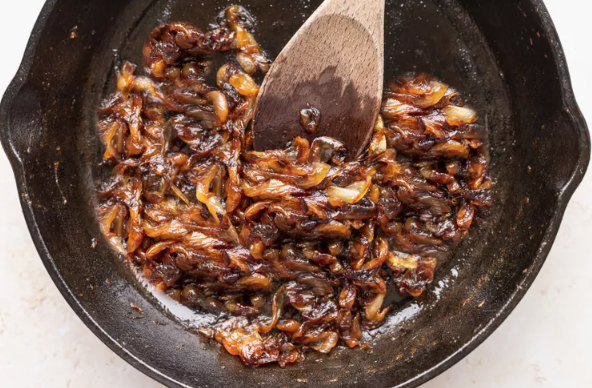
Several medium or large onions, yellow, white, or red
Extra virgin olive oil
Butter, optional
Kosher salt
Sugar, optional
Balsamic vinegar, optional
Instructions:
Step One: Slice 1/2-inch off the stem ends of the onions and the roots off of the root end. Place the onions cut side down on the cutting board. Cut them in half through the root end. Peel back the peels from the onions.
Lay the onions cut side down and make angled cuts into each onion, aimed at the center, cutting almost all the way, but not completely through the root end. Make the cuts to your desired level of thickness.
The root end will help hold the onion together as you cut it, making it easier to cut. Then cut a V in the root end to cut out the tough root holding the slices together.
Step Two: Use a wide, thick-bottomed sauté pan for maximum pan contact with the onions. Coat the bottom of the pan with olive oil, or a mixture of olive oil and butter, if using (about 1 teaspoon per onion).
Heat the pan on medium high heat until the oil is shimmering. Add the onion slices and stir to coat the onions with the oil. Spread the onions out evenly over the pan and let cook, stirring occasionally.
Depending on how strong your stovetop burner is you may need to reduce the heat to medium or medium low to prevent the onions from burning or drying out.
After 10 minutes, sprinkle some salt over the onions, and if you want, you can add some sugar to help with the caramelization process. (I add only about a teaspoon of sugar for 5 onions, you can add more.) One trick to keeping the onions from drying out as they cook is to add a little water to the pan.
Step Three: Let the onions cook for 30 minutes to 1 hour more, stirring every few minutes. As soon as the onions start sticking to the pan, let them stick a little and brown, but then stir them before they burn.
The trick is to leave them alone enough to brown (if you stir them too often, they won’t brown), but not so long so that they burn. After the first 20 to 30 minutes you may want to lower the stove temperature a little, and add a little more oil, if you find the onions are verging on burning.
A metal spatula will help you scrape up the browned bits from the bottom of the pan as the caramelization proceeds. As the onions cook down, you may find you need to scrape the pan every minute, instead of every few minutes.
Continue to cook and scrape, cook and scrape, until the onions are a rich, browned color. At the end of the cooking process you might want to add a little balsamic vinegar or wine to help deglaze the pan and bring some additional flavor to the onions.
Store refrigerated for several days in an air-tight container.
Notes: Add these onions to this horseradish sauce for a full and rich sauce.
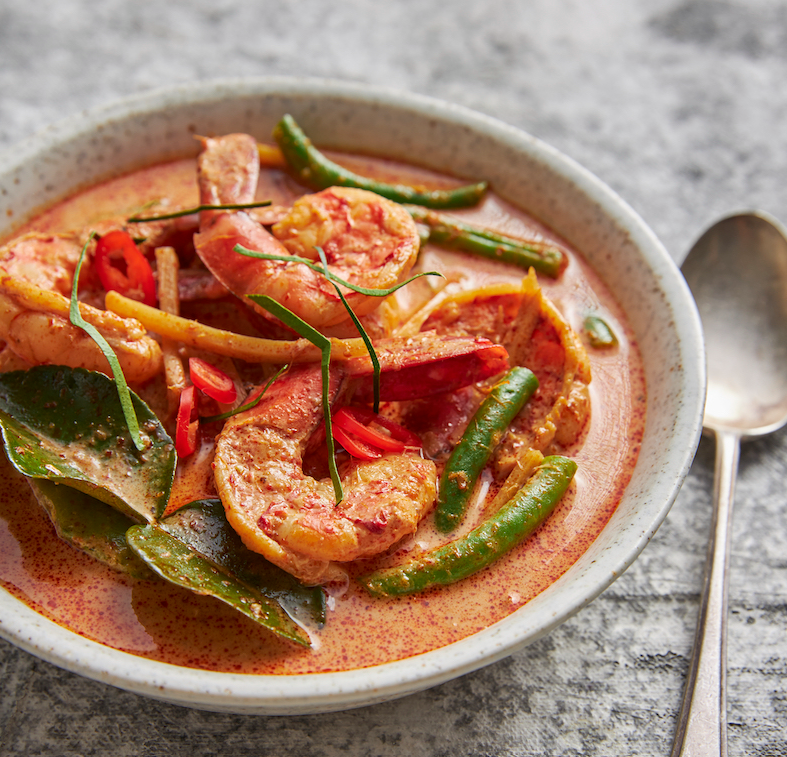
1 cup of vegetables (we used green beans and sliced bamboo shoots)
1-2 tsp fish sauce, or to taste
shredded makrut leaves, to serve (optional)
finely sliced fresh red chilli, to serve (optional)
steamed rice, to serve
Instructions:
Step One: Heat the oil in a saucepan over medium heat and cook the paste for a minute or so until it smells yum.
Step Two: Stir through the coconut milk. Add prawns, vegetables and 1/2 cup of water. Bring to a gentle simmer and cook for 8-10 minutes or until your chosen additions are cooked through.
Step Three: Taste and season with fish sauce to your liking. Top with lime leaves and red chilli, if using. Serve with steamed rice. Enjoy!
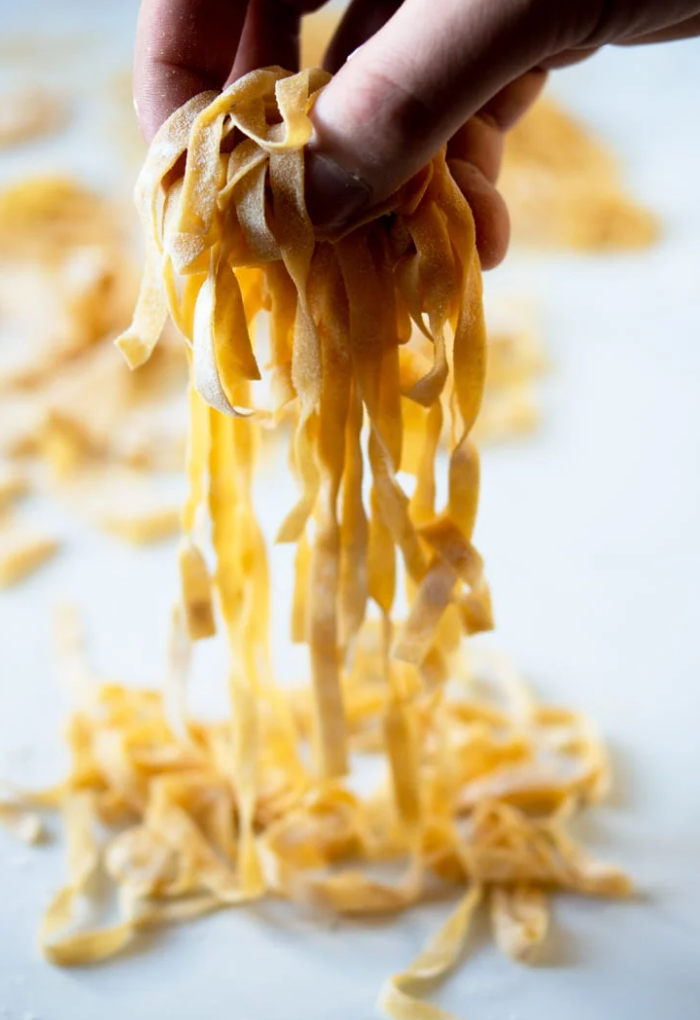
Step One: Place the flour on a clean work surface, make a well in the middle and add the eggs
Step Two: Using a fork whisk the eggs whilst slowly incorporating the flour until combined and looks like a very rough dough. You may need to use your hands once most of the egg is incorporated to help it along
Step Three: Bring the dough together with your hands to form a ball. Knead the dough for 10 minutes until smooth and pliable. Wrap the dough in cling film and leave to rest for 30 minutes, out of the fridge
Step Four: Once the dough is rested it’s time to roll it out. Cut the dough in half so it’s easier to roll out and flatten it with the palm of your hand so it will fit through the first setting on the pasta machine
Step Five: Pass the dough through the widest setting once then fold one side over the other as shown on photos 9 and 10. Flatten the dough with the palm of your hand again so it will fit through the widest setting and roll it through again
Step Six: Repeat this process folding the sides in and passing it through the widest setting four times. Once you’ve done that pass the dough through each setting once from the widest to the second last setting
Notes: This pasta dough can be used for any pasta – even lasagna