All posts in March 2023

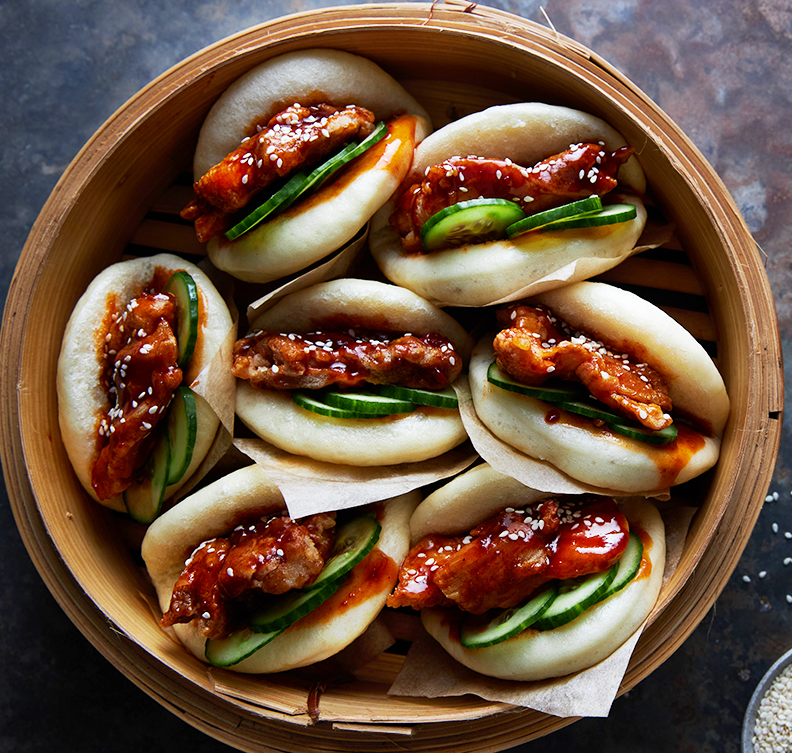
Korean Bao Buns

Created on 3/05/2021
Ingredients:

Bao Buns

  • 360g (12.6 oz) plain (all-purpose) flour, plus extra for dusting 
  • 1 tsp baking powder 
  • 1 tsp instant dry yeast 
  • 35g (1 oz) white sugar 
  • 35g (1 oz) vegetable oil, plus extra for greasing the dough 
  • 180g (6.3 oz) warm water 
  • 20ml milk 
  • vegetable oil, for greasing 

Korean Chicken

  • 4 large chicken thigh fillets, cut into bite-sized pieces 
  • 2 tsp sea salt 
  • ¼ tsp ground black pepper  
  • 1 cup cornstarch 
  • vegetable oil for deep frying 
  • 1 tsp sesame seeds 
  • thinly sliced cucumber to serve 

Sauce for Chicken

  • 1/3 cup soy sauce 
  • 1/3 cup sugar 
  • 2 tbsp apple cider vinegar 
  • 2 tbsp gochujang*  
  • 2 tbsp tomato ketchup 
  • 3 garlic cloves, finely chopped 

Other

  • ***Individual square baking sheets

Instructions:

Step One: To make the bao, mix the flour, baking powder, yeast and sugar in a large bowl. In a separate bowl, mix together the vegetable oil, water and milk. Make a well in the center of the dry ingredients and pour in the oil mixture. Stir with a wooden spoon, and then use your hands to knead until the dough comes together. Empty out onto a work surface and knead for 5 minutes or until smooth, adding extra flour if the dough sticks to the palm of your hand. Return the dough to the mixing bowl, cover it, and rest in a warm place for 90 minutes or until doubled in size

Step Two: Once risen, transfer the dough to a work surface and knead for another 5 minutes. Place a small amount of oil in a small bowl. Flatten the dough and use a rolling pin to roll out the dough a little. Dip you fingers into the oil and rub on both sides of the dough to stop it from sticking to your work surface. Then continue to roll out the dough until it is about 1cm (roughly ½”) thick. Give the top of the dough a final rub of oil. Then use an 8cm (around 3 ¼”) cookie cutter to cut out dough circles. Fold each circle over in half and transfer to a square of baking paper. Use the rolling pin to roll over the top to gently flatten each folded piece. Any extra dough can now be rolled out again and cut and folded in the same way. Cover the bao lightly with a tea towel and allow to rise for 30 minutes

Step Three: Fill a wok one-third full with water and place over high heat. Place a bamboo steamer over the wok. When the water is boiling, steam the buns in batches in the steamer for 12 minutes or until fluffy and cooked through. Then turn off the heat (don’t lift the lid) and allow the buns to rest over the hot water for 5 minutes before transferring to a plate or tray. Note: Buns can be made up to a day in advance and steamed to re-heat before serving. They can also be frozen at this point and reheated from frozen in the steamer before serving

Step Four: To make the fried chicken, season the chicken with salt and pepper, then set aside

Step Five: For the sticky sauce, place the ingredients in a small saucepan over high heat. Bring to a simmer and cook for about 5 minutes or until just thickened. Set aside until ready to serve

Step Six: Dust each piece of chicken in the cornstarch, tapping off any excess

Step Seven: Fill a wok or saucepan to about 1/3 capacity with the vegetable oil and place over high heat. The oil is hot enough when a wooden spoon dipped into the oil forms little bubbles. Cook the chicken (do this in batches if your wok is small) for about 5 minutes or until golden and cooked through. Drain on a wire baking rack

Step Eight: Brush the warm chicken with the sticky sauce (reserve about a quarter of the sauce for serving). Sprinkle the chicken with sesame seeds

Step Nine: To serve, open up each bao and spoon a little sauce into the center. Stuff with cucumber slices and pieces of fried chicken. Serve immediately
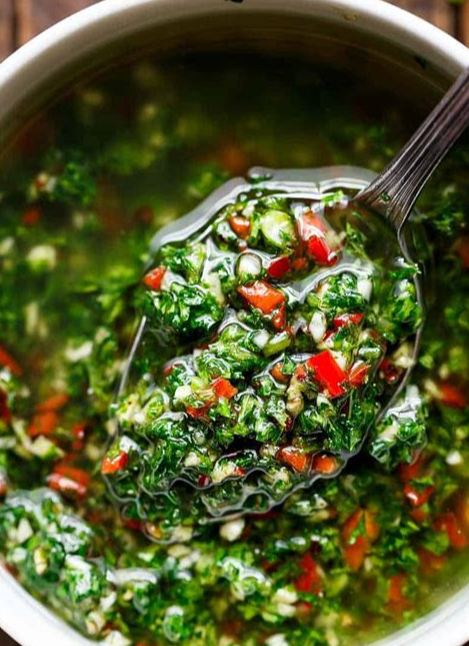
Chimichurri Sauce

Created on 3/23/2023

Ingredients:

  • 1/2 cup olive oil
  • 2 tablespoons red wine vinegar
  • 1/2 cup finely chopped parsley
  • 3-4 cloves garlic , finely chopped or minced
  • 2 small red chilies , or 1 red chili, deseeded and finely chopped (about 1 tablespoon finely chopped chili)
  • 3/4 teaspoon dried oregano
  • 1 level teaspoon coarse salt
  • pepper , to taste (about 1/2 teaspoon)

Instructions:

Step One: Mix all ingredients together in a bowl. Allow to sit for 5-10 minutes to release all of the flavors into the oil before using. Ideally, let it sit for more than 2 hours, if time allows

Step Two: Chimichurri can be prepared earlier than needed, and refrigerated for 24 hours, if needed

Step Three: Use to baste meats (chicken or steaks) while grilling or barbecuing. This can also be used as a marinade, although that is not authentic to South America

Notes: This is excellent on seafood like scallops, shrimp and white fish

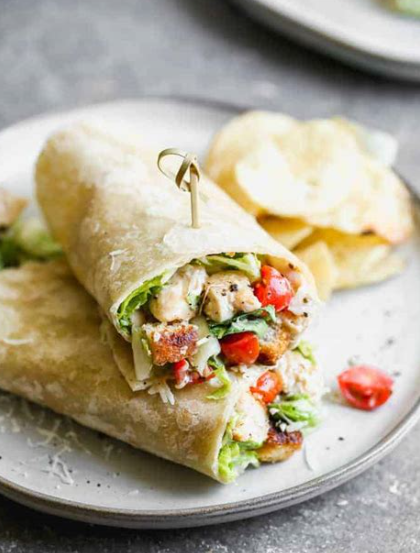
Spicy Chicken Caesar Salad Wrap

Created on 3/10/2023

Ingredients:

For the chicken:

  • 2 chicken breasts, cut in half lengthwise
  • Salt and pepper
  • 1/4 cup freshly grated parmesan cheese
  • 3 tablespoons Italian seasoning

For the wrap:

  • One heart of romaine, cut in half and chopped into small pieces
  • Handful of cherry tomatoes, chopped
  • Half of avocado, chopped into bite sized pieces
  • 1/2 cup of Taki’s, broken into small pieces (or another spicy crunchy snack)
  • Freshly grated parmesan
  • Green onion or purple onion
  • Caesar dressing
  • 4 tortillas

Instructions:

Step One: Add salt and pepper, parmesan cheese and Italian seasoning to the halved chicken breasts. Cook on a medium high heat in a medium pan until fully cooked.

Step Two: Let the chicken rest on a plate or cutting board for at least five minutes. Warm up the tortillas in the microwave for about 20 seconds.

Step Three: After resting, chop the chicken up into small bite sized pieces. Add ample amount of chicken to each tortilla. Grated Parmesan cheese over the chicken. Add even amounts of romaine lettuce, cherry tomatoes, avocado, Taki’s, onion and dressing to each tortilla. Wrap it up and enjoy!

Notes: This dressing is a great dairy free/healthier option than Caesar dressing.

Kayla’s Vinegarette

Created on 3/10/2023

Ingredients:

  • 1/2 shallot, minced
  • 1 medium sized garlic clove, minced
  • One tablespoon Dijon mustard
  • 1 fresh bunch dill, chopped
  • 1 tablespoon apple cider vinegar
  • 3 tablespoons olive oil
  • 1/2 lemon, squeezed
  • Salt and freshly ground pepper

Instructions:

Step One: Add all ingredients to a mason jar or salad dressing jar and shake vigorously to emulsify the ingredients. If you prefer a thinner dressing, add a tablespoon of water at a time, shake vigorously, then assess the consistency. Add more water if desired.

Notes: This dressing tastes amazing on this wrap.

Carmelized Onions

Created on 2/10/2018

Ingredients:

  • Several medium or large onions, yellow, white, or red
  • Extra virgin olive oil
  • Butter, optional
  • Kosher salt
  • Sugar, optional
  • Balsamic vinegar, optional

Instructions:

Step One: Slice 1/2-inch off the stem ends of the onions and the roots off of the root end. Place the onions cut side down on the cutting board. Cut them in half through the root end. Peel back the peels from the onions.

Lay the onions cut side down and make angled cuts into each onion, aimed at the center, cutting almost all the way, but not completely through the root end. Make the cuts to your desired level of thickness.

The root end will help hold the onion together as you cut it, making it easier to cut. Then cut a V in the root end to cut out the tough root holding the slices together.

Step Two: Use a wide, thick-bottomed sauté pan for maximum pan contact with the onions. Coat the bottom of the pan with olive oil, or a mixture of olive oil and butter, if using (about 1 teaspoon per onion).

Heat the pan on medium high heat until the oil is shimmering. Add the onion slices and stir to coat the onions with the oil. Spread the onions out evenly over the pan and let cook, stirring occasionally.

Depending on how strong your stovetop burner is you may need to reduce the heat to medium or medium low to prevent the onions from burning or drying out.

After 10 minutes, sprinkle some salt over the onions, and if you want, you can add some sugar to help with the caramelization process. (I add only about a teaspoon of sugar for 5 onions, you can add more.) One trick to keeping the onions from drying out as they cook is to add a little water to the pan.

Step Three: Let the onions cook for 30 minutes to 1 hour more, stirring every few minutes. As soon as the onions start sticking to the pan, let them stick a little and brown, but then stir them before they burn.

The trick is to leave them alone enough to brown (if you stir them too often, they won’t brown), but not so long so that they burn. After the first 20 to 30 minutes you may want to lower the stove temperature a little, and add a little more oil, if you find the onions are verging on burning.

A metal spatula will help you scrape up the browned bits from the bottom of the pan as the caramelization proceeds. As the onions cook down, you may find you need to scrape the pan every minute, instead of every few minutes.

Continue to cook and scrape, cook and scrape, until the onions are a rich, browned color. At the end of the cooking process you might want to add a little balsamic vinegar or wine to help deglaze the pan and bring some additional flavor to the onions.

Store refrigerated for several days in an air-tight container.

Notes: Add these onions to this horseradish sauce for a full and rich sauce.

Horseradish Sacuce for Sandwiches

Created on 3/7/2023

Ingredients:

  • 1/2 cup sour cream
  • 2 Tbsp prepared horseradish, drained
  • 2 Tbsp mayo
  • 1 tsp apple cider vinegar
  • 1/4 tsp salt
  • 1/8 tsp black pepper
  • 1 Tbsp chives, finely chopped

Instructions

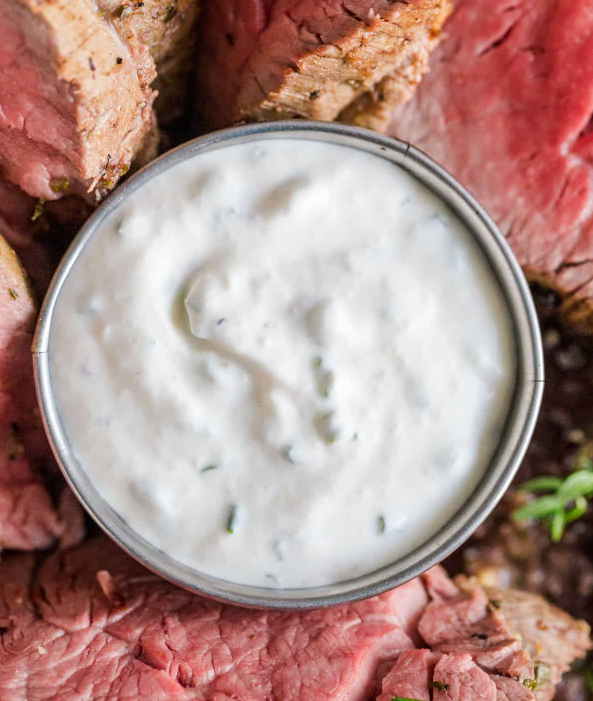
Step One: In a small mixing bowl, stir all of the ingredients together. Serve right away or cover and refrigerate for about 2 weeks.

Notes: Pro tip, add these carmelized onions to this sauce for a richer flavor. This sauce is perfect for this pastrami sandwich!

Pastrami Sandwich

Created on 3/7/2023

Ingredients:

  • 1 lb sliced pastrami beef deli meat
  • 4 hoagie rolls
  • 8 slices provolone cheese or 1 1/2 cups mozzarella cheese, shredded
  • Horseradish sauce
  • Mustard of choice
  • Pickles
  • 1/2 lb about 10-12 mushrooms, thickly sliced
  • Garlic Salt & Black Pepper, to taste
  • 1 1/2 cups Beef Broth

Instructions:

Step One: Preheat the oven to 350 degrees

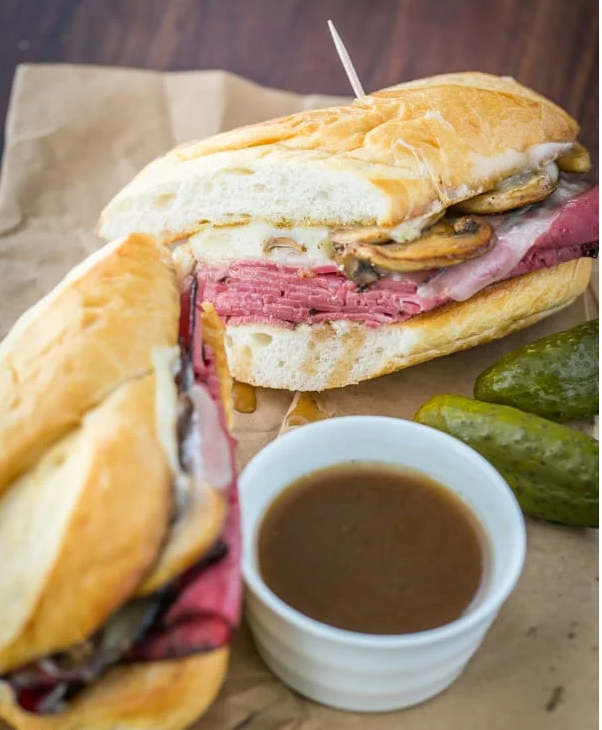
Step Two: Saute Mushrooms until golden and soft. Sprinkle with garlic salt and pepper to taste. Remove mushrooms from pan and set aside. In the same skillet (without cleaning it), add 1 1/2 cups beef broth and boil for a few minutes to reduce slightly. Season broth to taste (you want it to be flavorful for use as a dip) then remove from heat – this broth is your “au jus” dipping sauce

Step Three: Heat a large pan over medium heat. Take the slices of pastrami and fry them in the pan to get each piece hot in temperature. Make sure to flip sides after a few minutes. Cut the hoagies in half. Add horseradish sauce on the bottom of each hoagie. Add a layer of pickles on top. Add the hot pastrami on top of the pickles. Layer a thick amount of cheese on top of the pastrami. Add sauted mushrooms. Coat the top of the hoage with mustard of choice. Put the sandwich in the oven. Cook until the cheese gets melted (10 is minutes)

Step Four: Serve each sandwich with an individual ramekin of AuJus – Dip with every bite

Chicken Tikka Masala

Created on 3/8/2023

Ingredients:

  • 3 boneless, skinless chicken breasts
  • ½ cup plain yogurt
  • 2 tablespoons lemon juice
  • 6 cloves garlic, minced
  • 1 tablespoon minced ginger
  • 2 teaspoons salt
  • 2 teaspoons ground cumin
  • 2 teaspoons garam masala
  • 2 teaspoons paprika

SAUCE

  • 3 tablespoons oil
  • 1 large onion, finely chopped
  • 2 tablespoons minced ginger
  • 8 cloves garlic, minced
  • 2 teaspoons ground cumin
  • 2 teaspoons ground turmeric
  • 2 teaspoons ground coriander
  • 2 teaspoons paprika
  • 2 teaspoons chili powder
  • 2 teaspoons garam masala
  • 1 tablespoon tomato puree
  • 3 ½ cups tomato sauce
  • 1 ¼ cups water
  • 1 cup heavy cream
  • ¼ cup fresh cilantro, for garnish
  • cooked rice, for serving
  • naan bread, for serving

SPECIAL EQUIPMENT

  • Bamboo or wooden skewer

Instructions:

Step One: Slice the chicken into bite-sized chunks. Combine the cubed chicken with the yogurt, lemon juice, garlic, ginger, salt, cumin, garam masala, and paprika and stir until well-coated.

Step Two: Cover and refrigerate for at least 1 hour, or overnight.

Step Three: Preheat the oven to 500°F (260°C). Line a high-sided baking pan or roasting tray with parchment paper.

Step Four: Place the marinated chicken pieces on bamboo or wooden skewers, then set them over the prepared baking pan, making sure there is space underneath the chicken to help distribute the heat more evenly. Bake for about 15 minutes, until slightly dark brown on the edges.

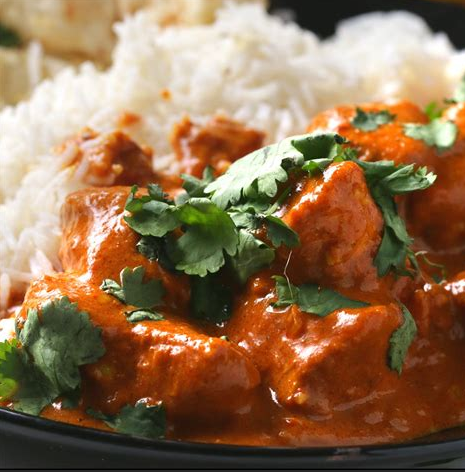
Step Five: Make the sauce: Heat the oil in a large pot over medium heat, then sauté the onions, ginger, and garlic until tender but not browned. Add the cumin, turmeric, coriander, paprika, chili powder, and garam masala and stir constantly for about 30 seconds, until the spices are fragrant. Stir in the tomato puree, tomato sauce, and 1 ¼ cups of water, then bring to a boil and cook for about 5 minutes. Pour in the cream.

Step Six: Remove the chicken from the skewers and add to the sauce, cooking for another 1-2 minutes. Garnish with cilantro and serve over rice or alongside naan bread.